Blogdown tutorial (Part 2)
Creating a Github repository
In part 1 we have installed the hugo-academic theme on top of R, RStudio and blogdown. We will continue the installation process with creating a remote GitHub repository.
-
In case you do not have a GitHub account, sign up for it. When you have finished the registration process click the button “Start a project”. If you already have an account click at “New repository”.
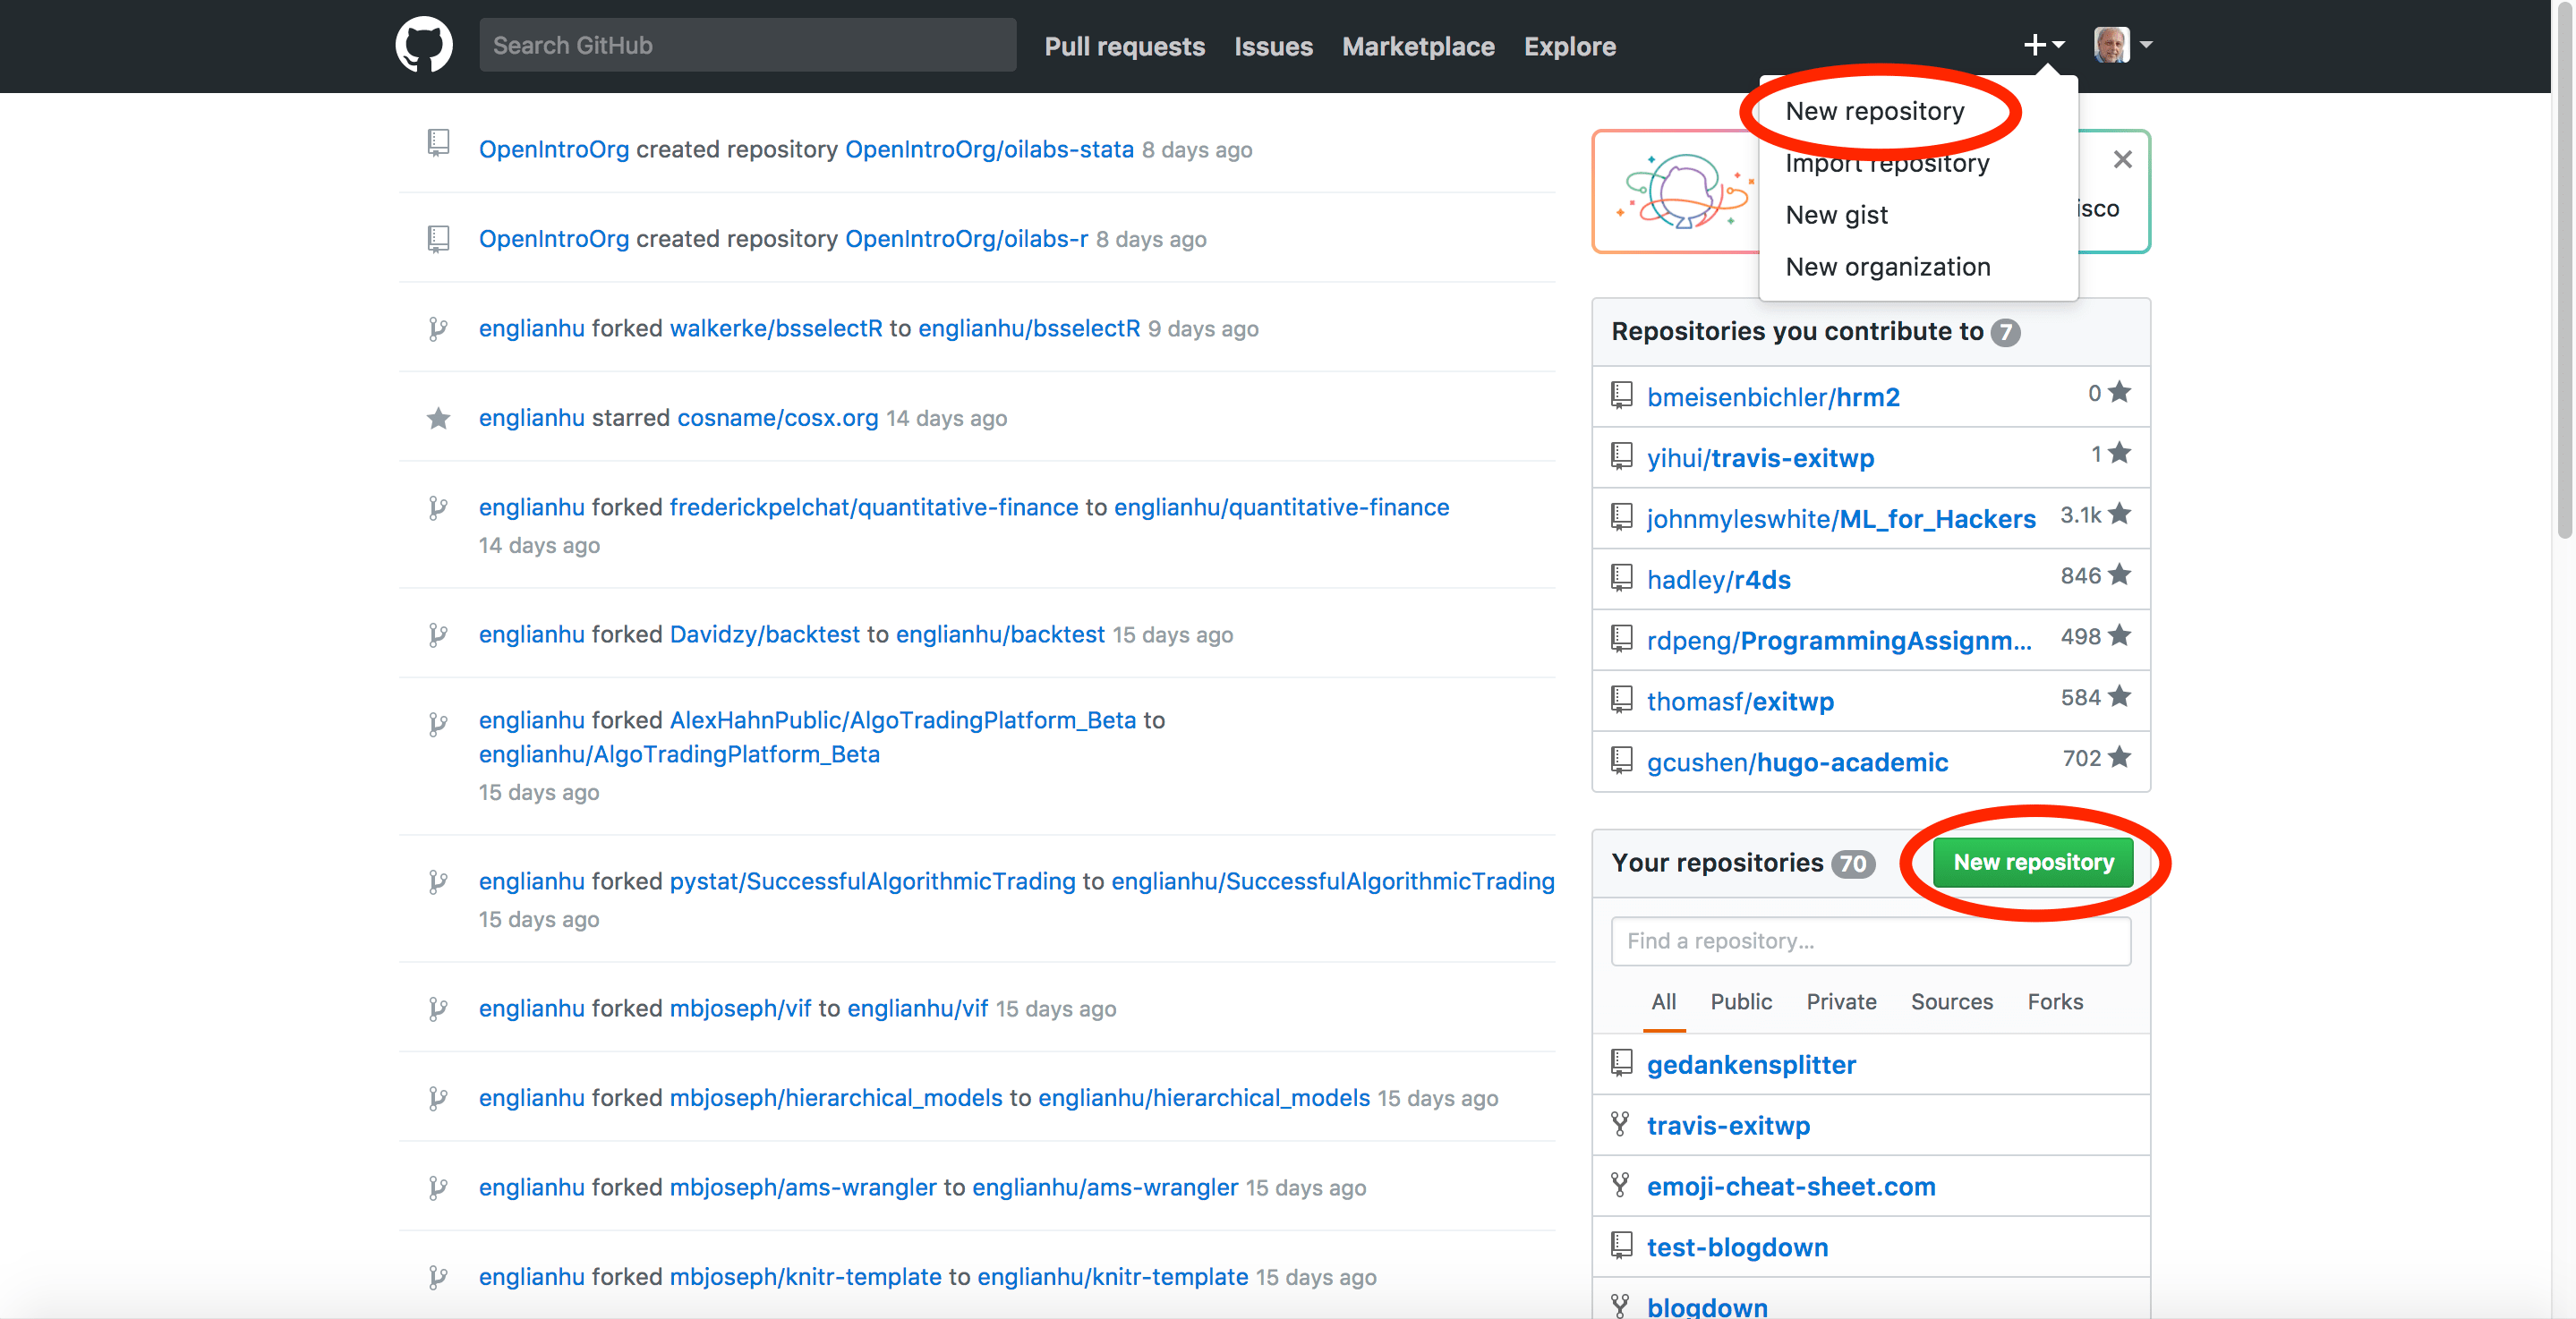
Creating a new GitHub repository.
-
Both actions (“Start a project” and “New repository”) opens up a window where you can name your new repository. Leave all the other options empty resp. as they are and click the green button “Create repository”.
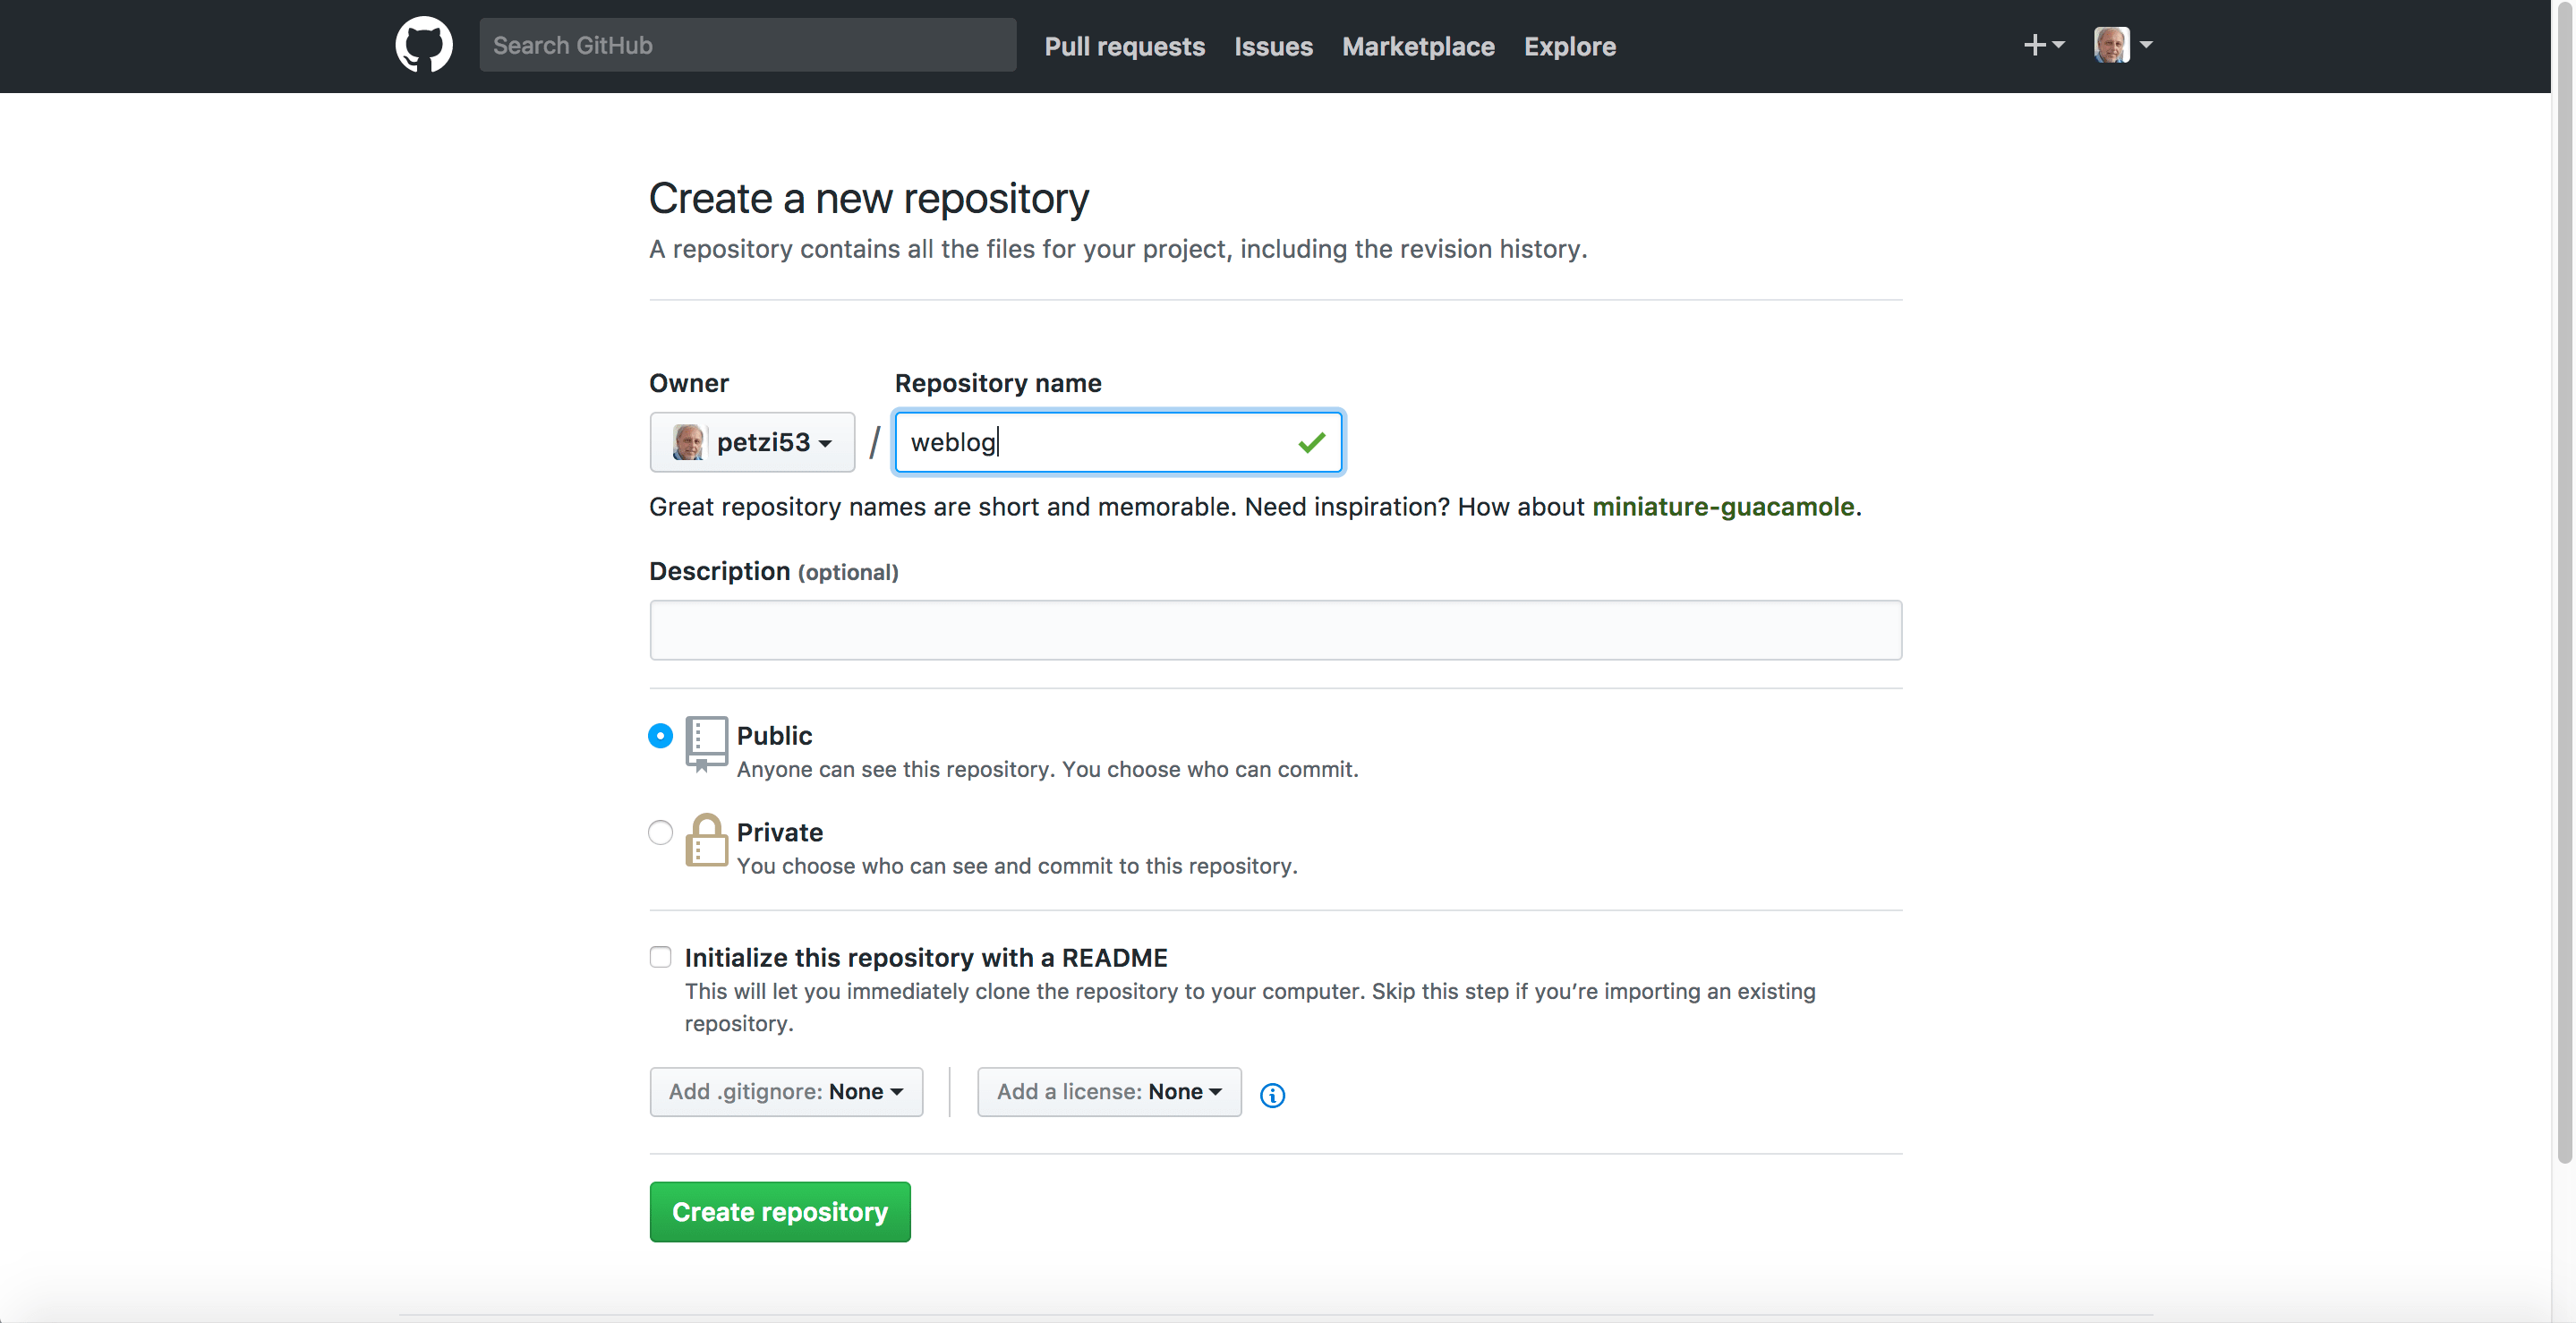
Name your new GitHub repository.
-
The last click brings you to a “Quick setup” page with several options. As there already exist a repository with our hugo-academic files, we copy the two lines in the third option: “push an existing repository from the command line”.
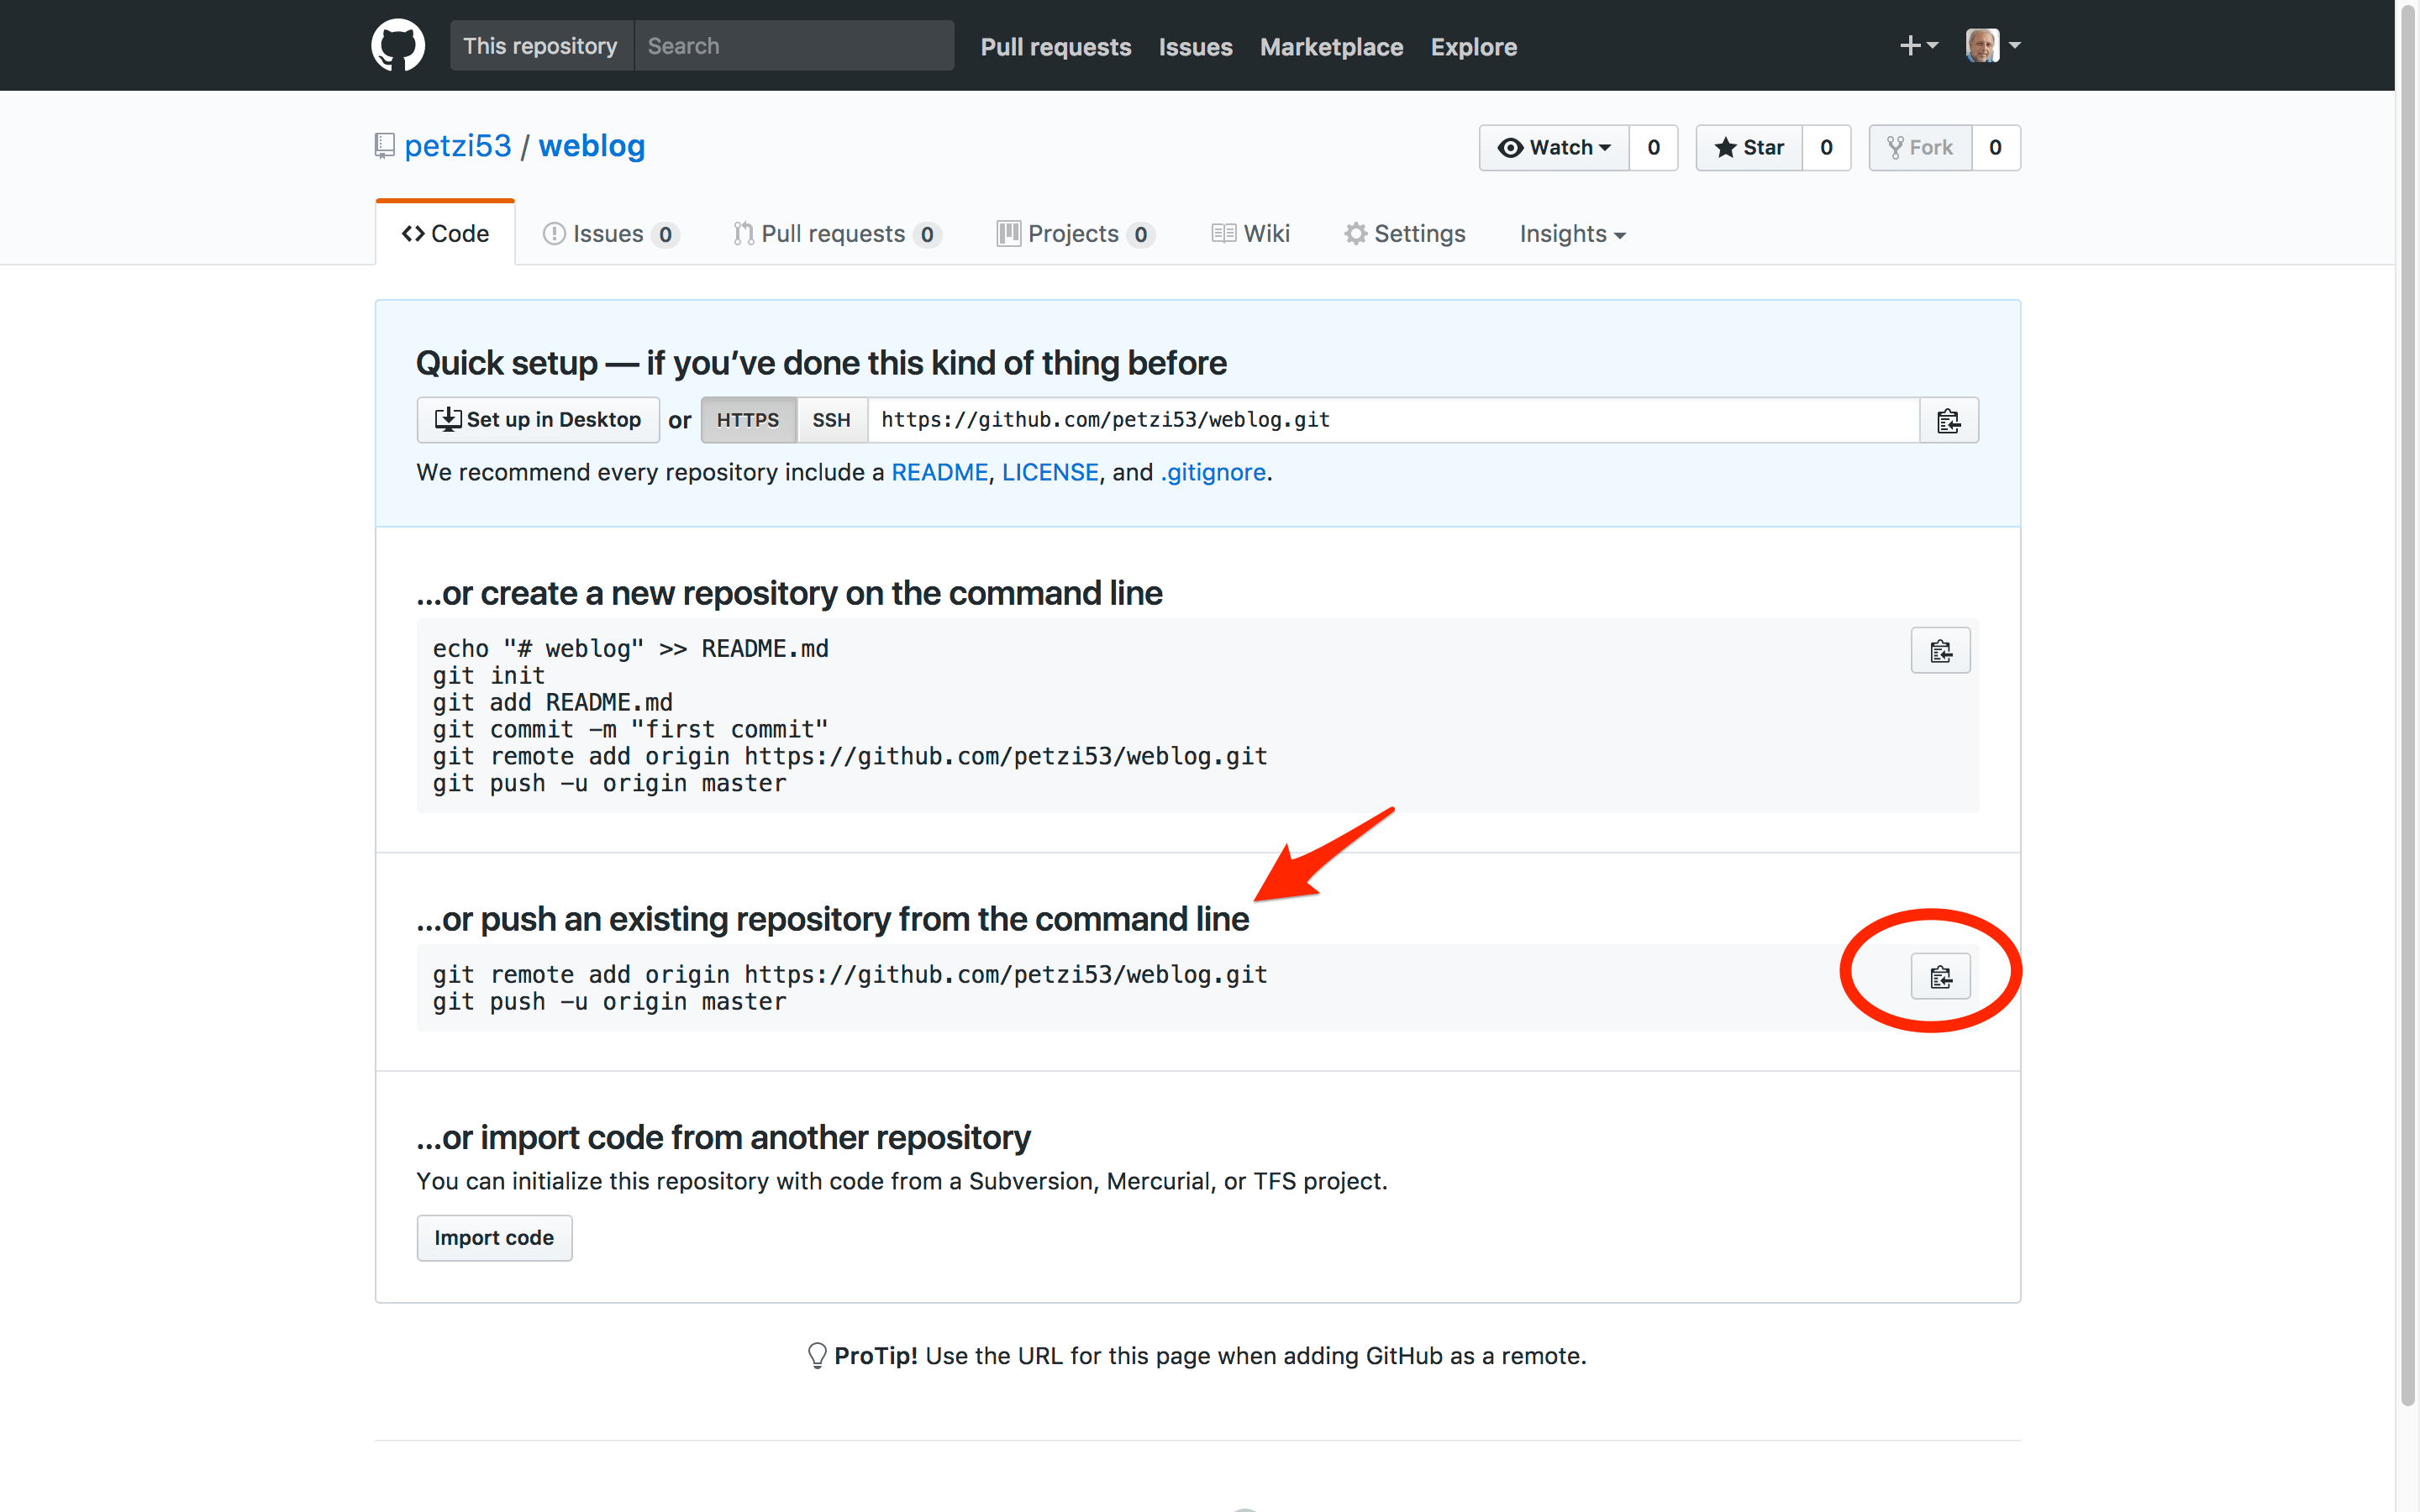
Quick setup: push an exiting repository from the command line.
-
But before we can paste these two lines into the terminal in order to link our local with the remote GitHub repository we need to download Git and install it. The best description I know of the installation procedure and its integration with RStudio is by Hadley Wickham in chapter 13 of his book about R Packages. There is a online version available. Read the two sections Initial set up and Create a local Git repository. For the mentioned shell commands you can use the Terminal tab of RStudio in the left lower pane.
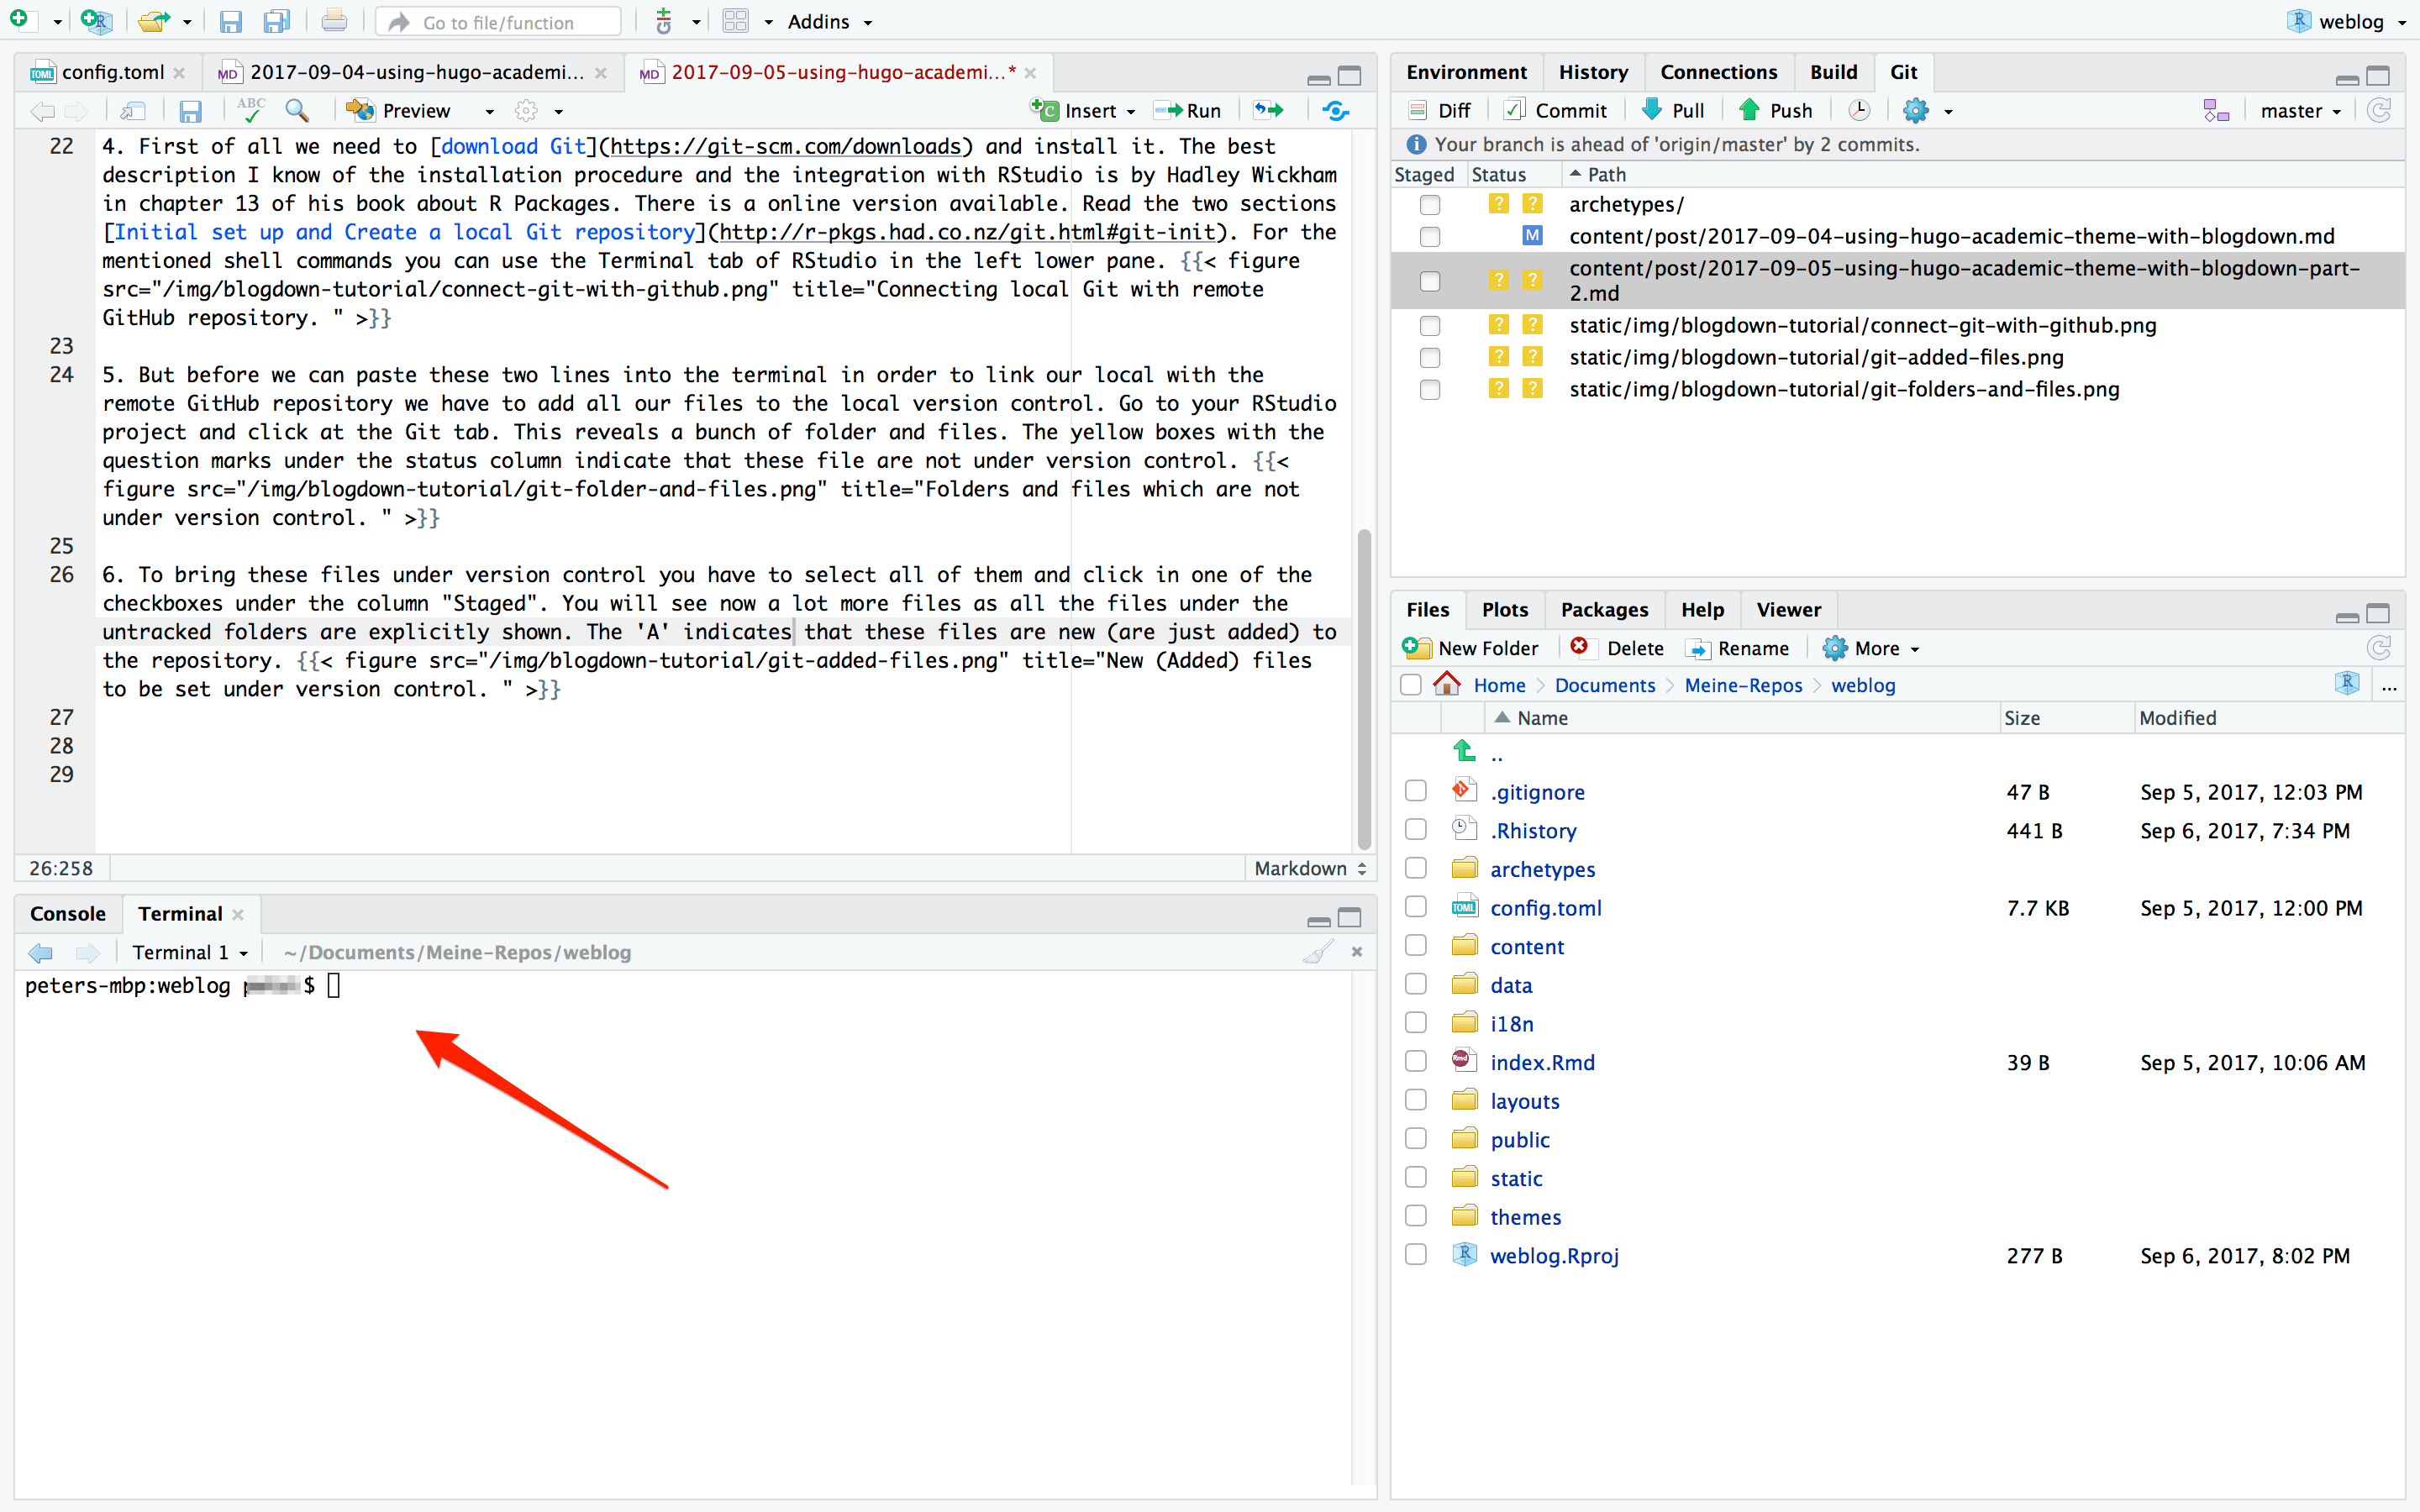
Use for the shell command the new terminal tab of RStudio.
-
After the shell command
git initthe local repository is under version control. After you have restarted RStudio you will now see new tabs in the RStudio panes. Click in the Git tab in the upper right pane. This reveals a bunch of folder and some files. The yellow boxes with the question marks under the status column indicate that these file are not yet under version control.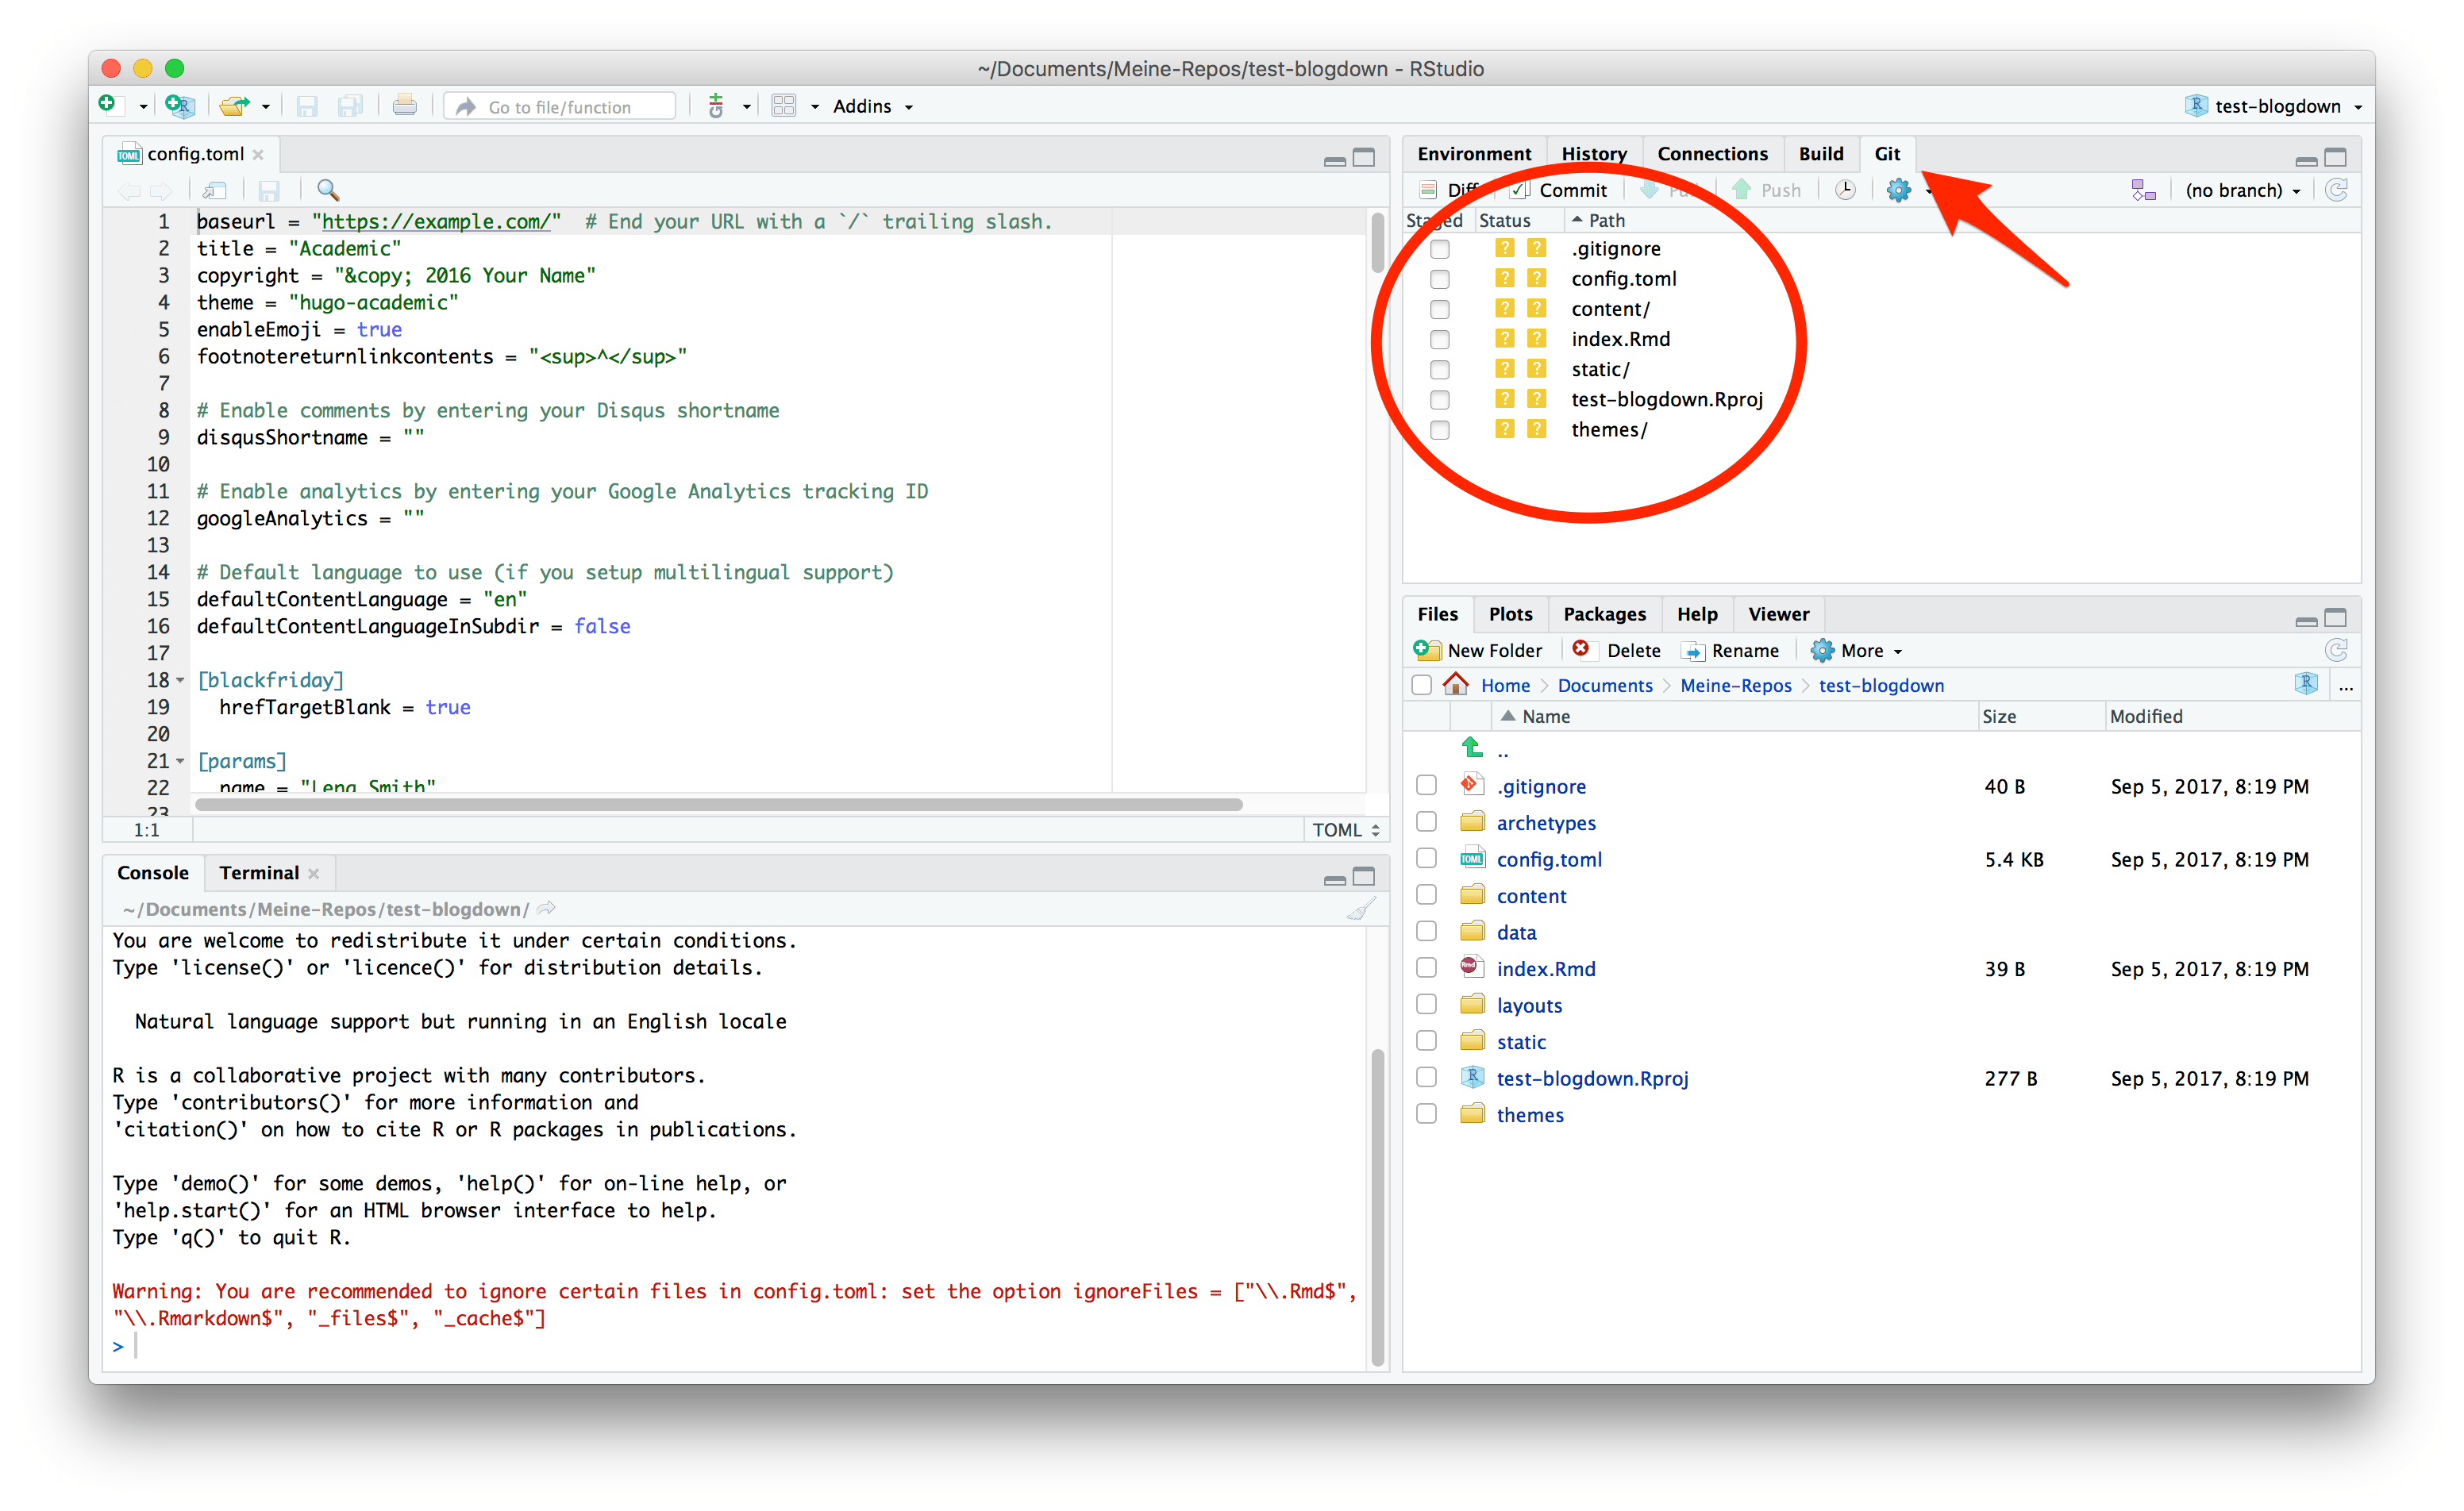
Folders and files which are not under version control.
-
To bring these folders and files under version control you have to select all of them and click in one of the check boxes under the column “Staged”. You will see now a lot more files as all the files under the still untracked folders are explicitly shown. The
Aindicates that these files are new (are just added) to the repository.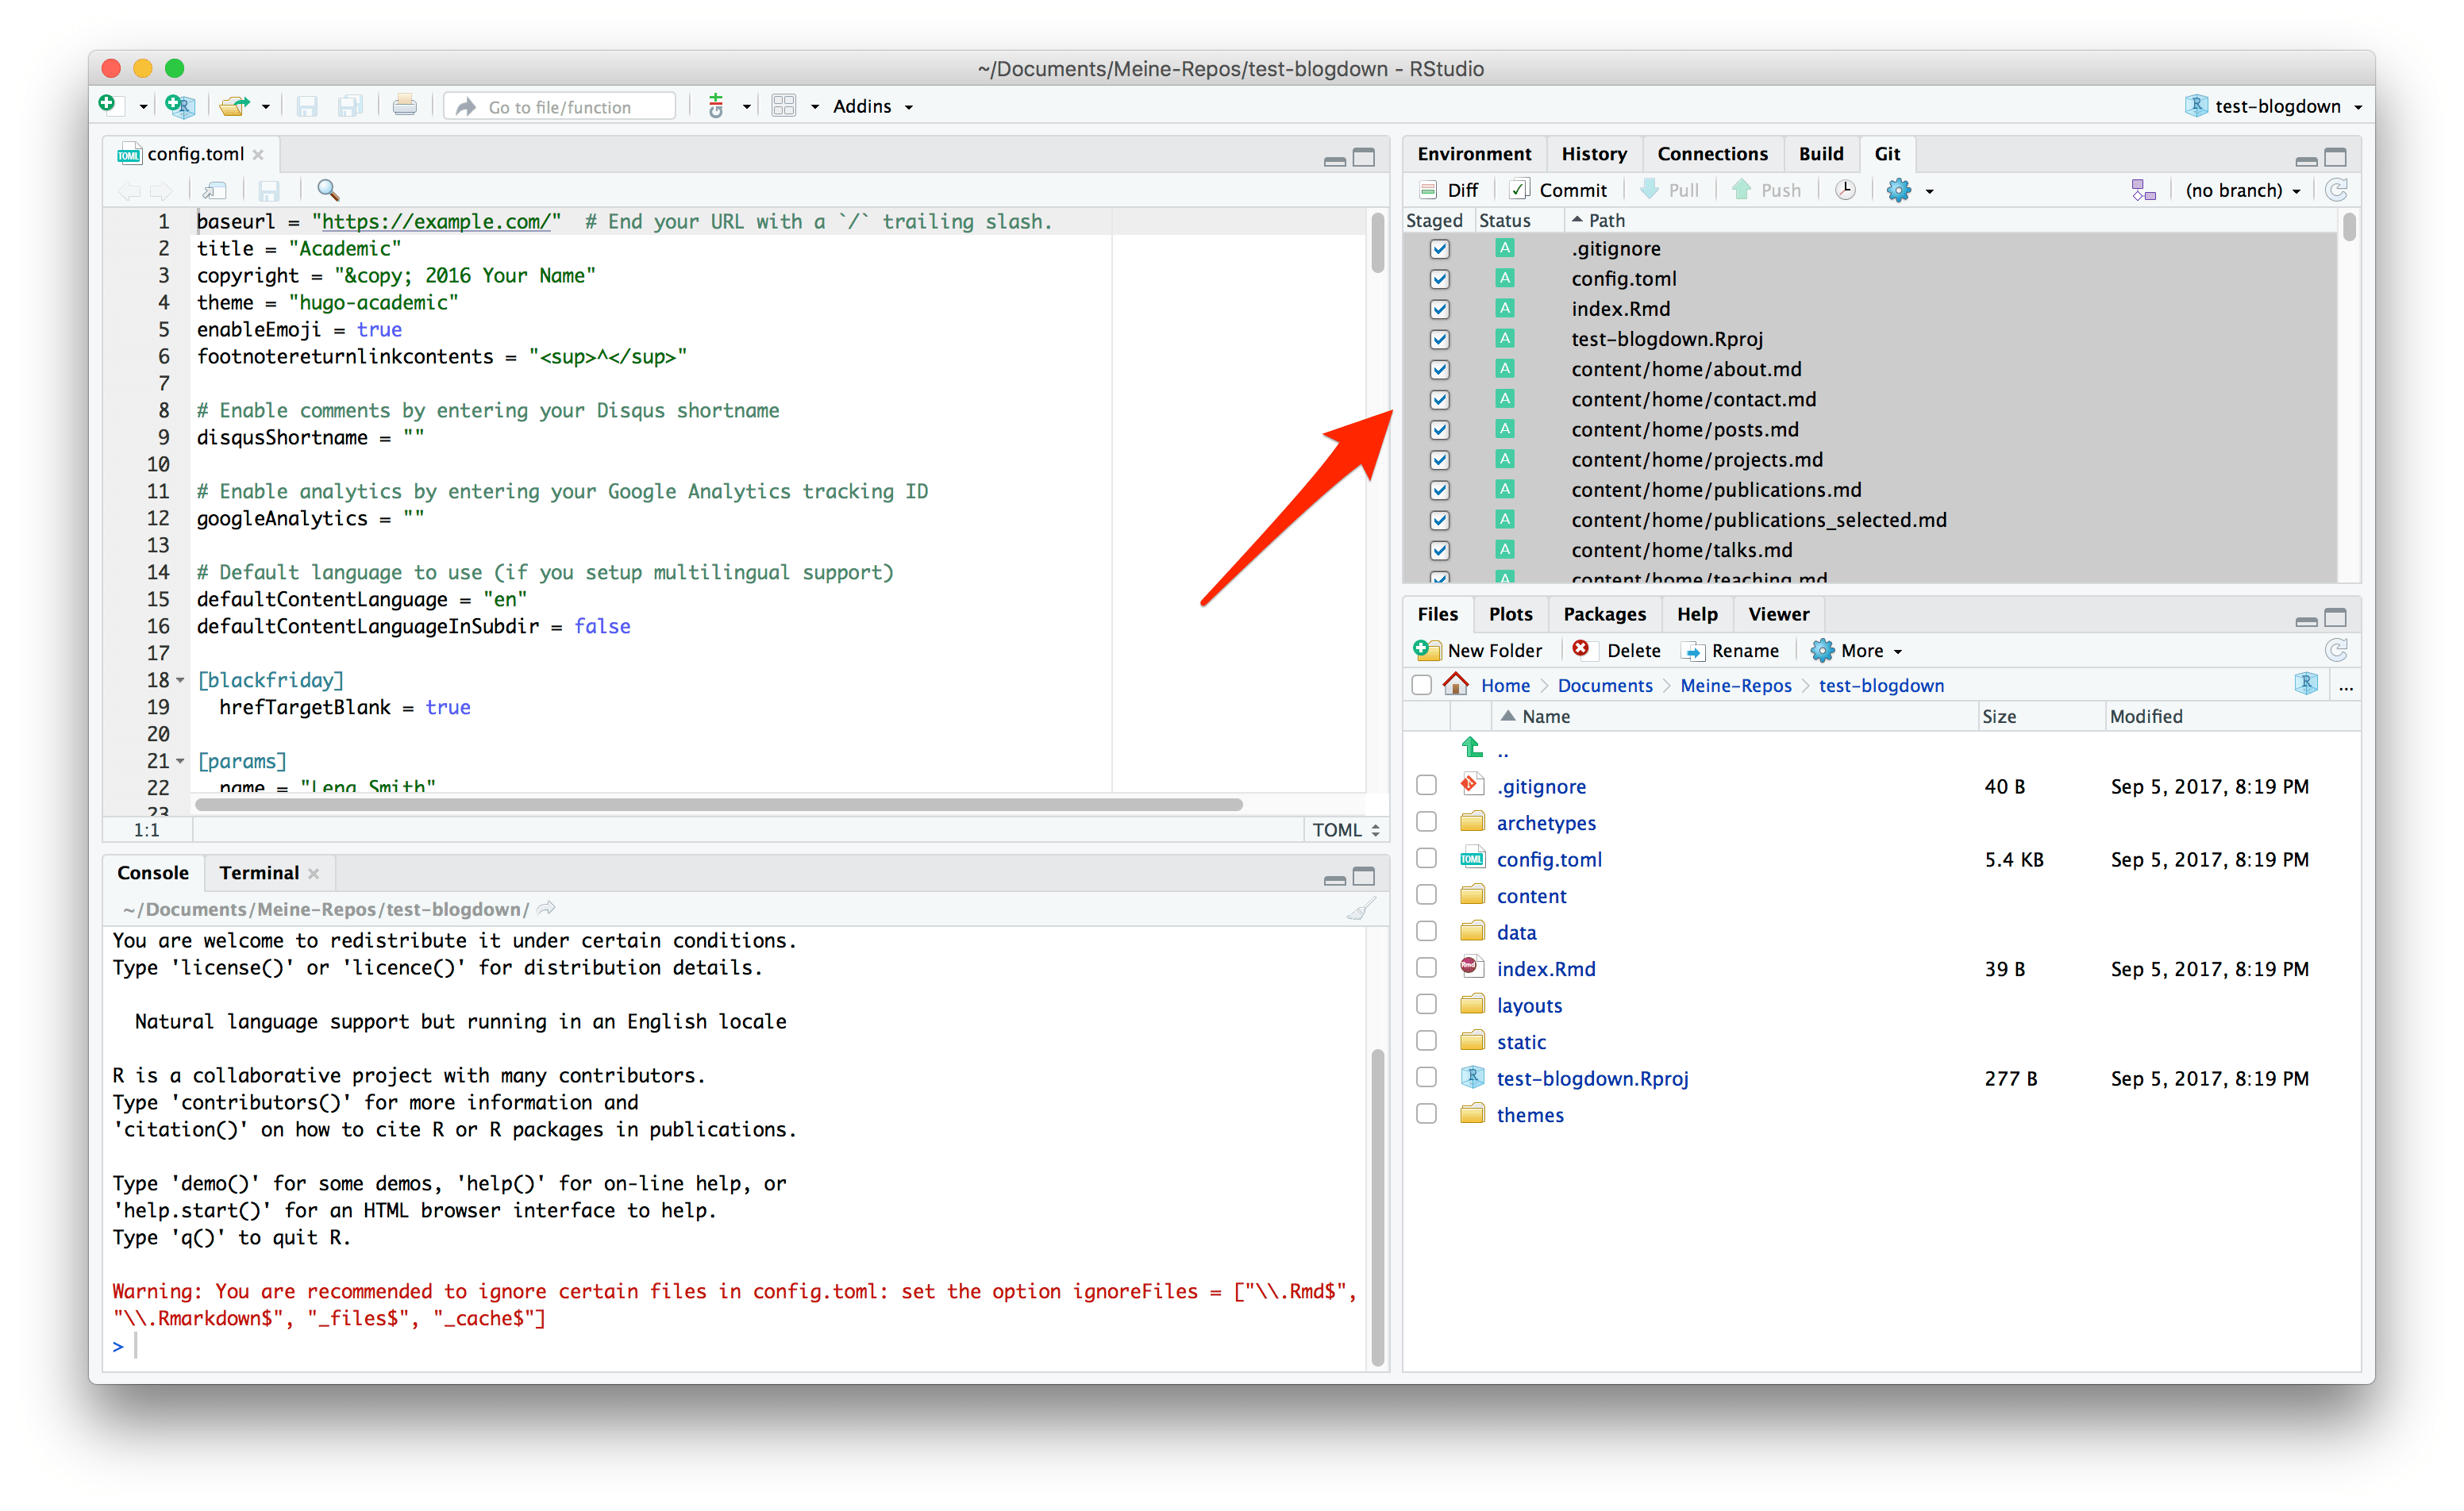
New (Added) files to be set under version control.
-
A click in the Commit tab opens up a new window where you must write a message. This is necessary so that all collaborators (including the future-you!) remembers what was the change about. This first (e.g.initial) commit will bring all the files under version control.
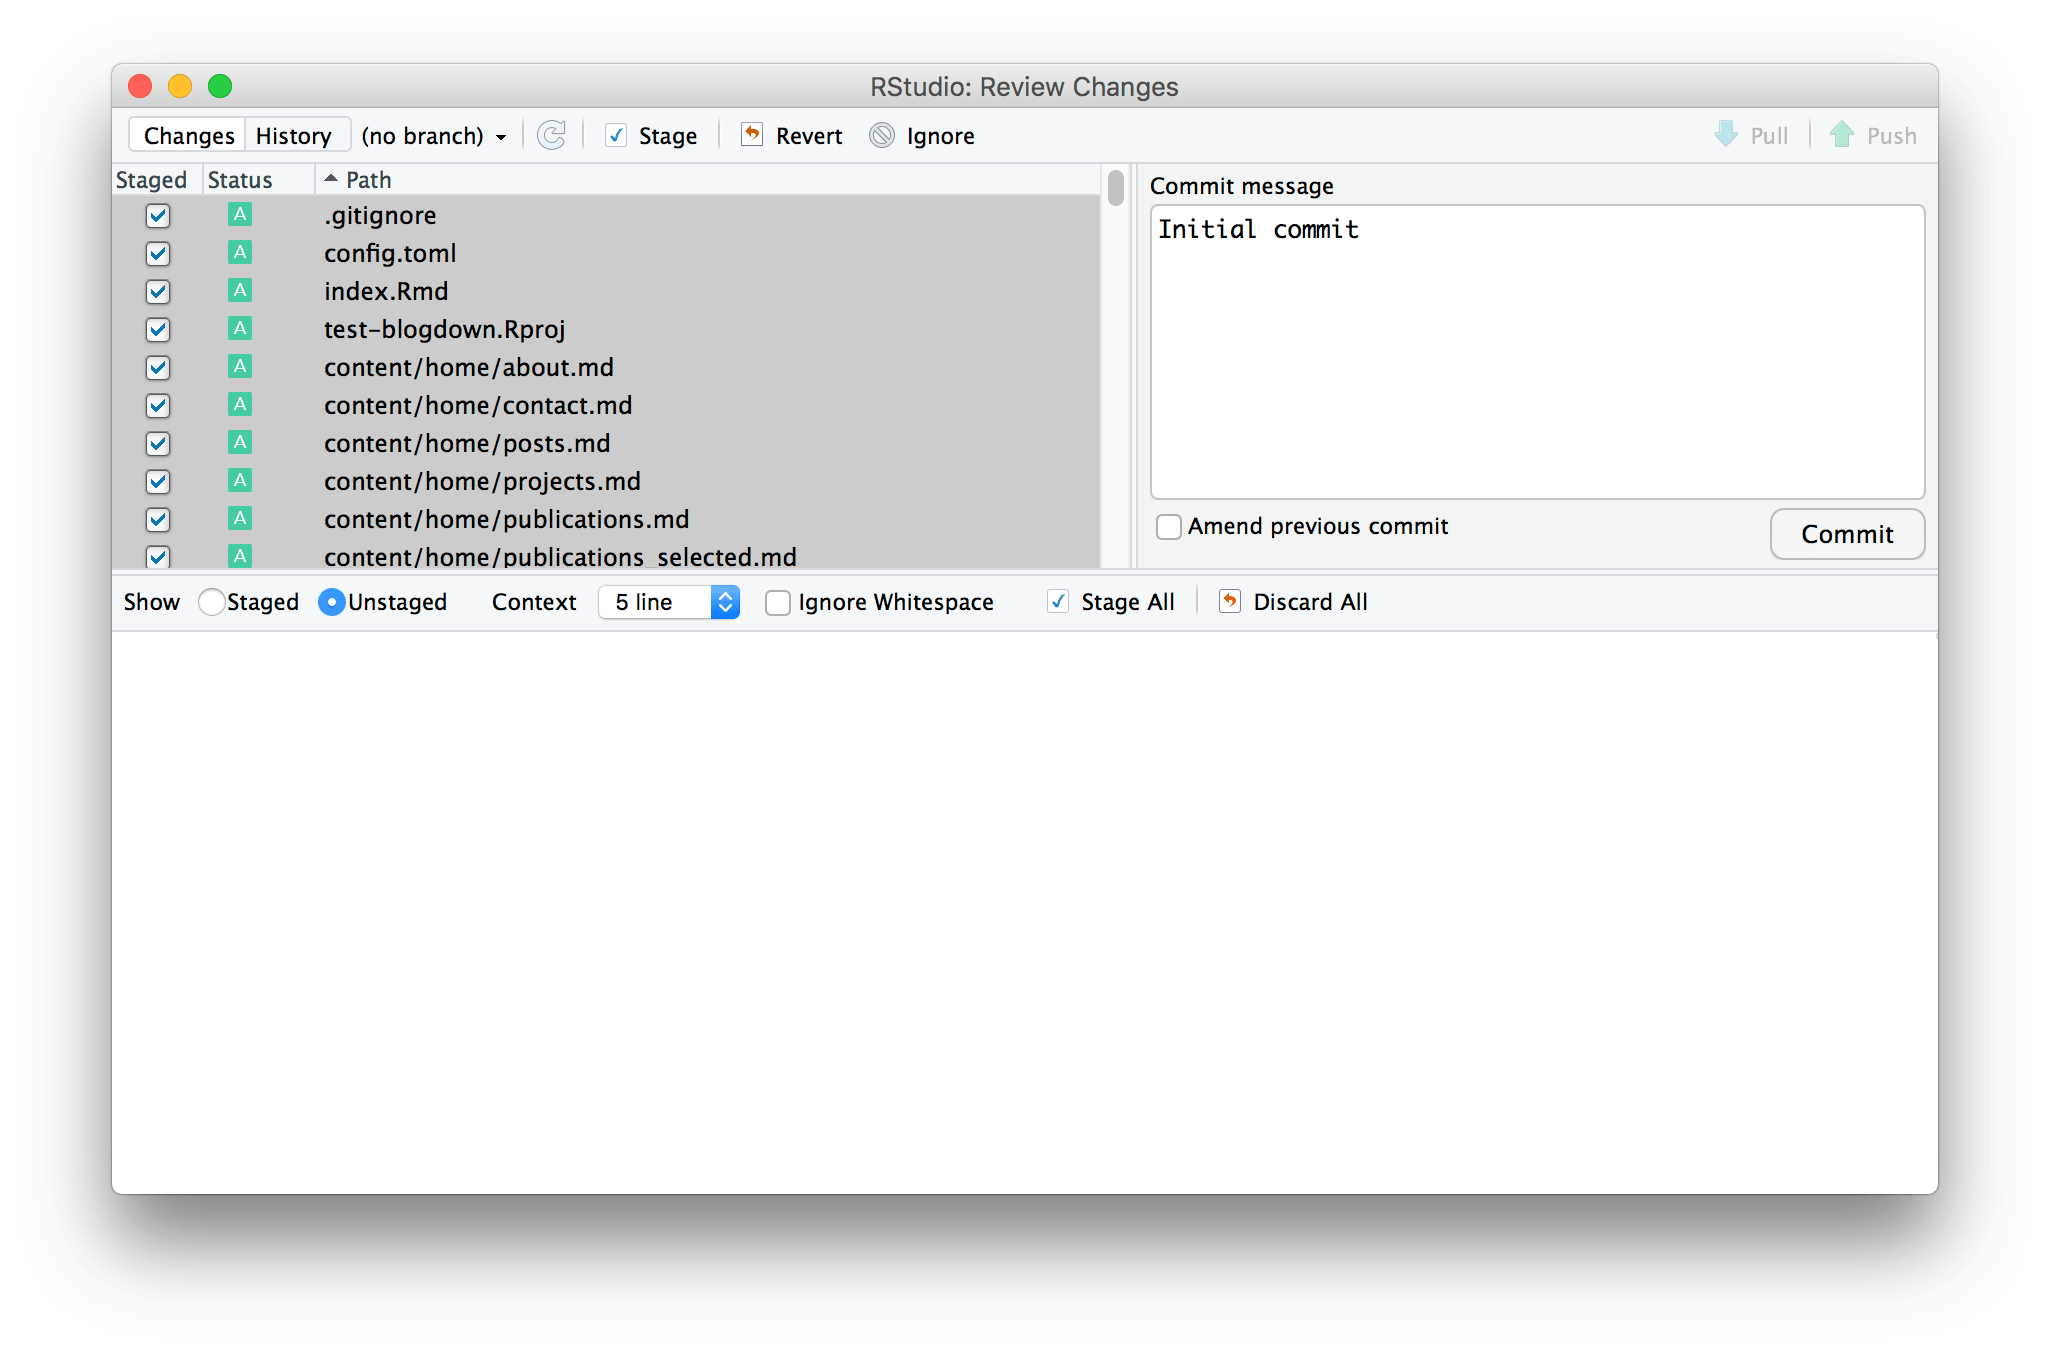
The initial commit brings many files under version control.
-
After sending your message by clicking the
Commitbutton you will see a list of all the committed files which are now in the local repository under version control. You can close this window and we can finally add our two lines copied from the GitHub page.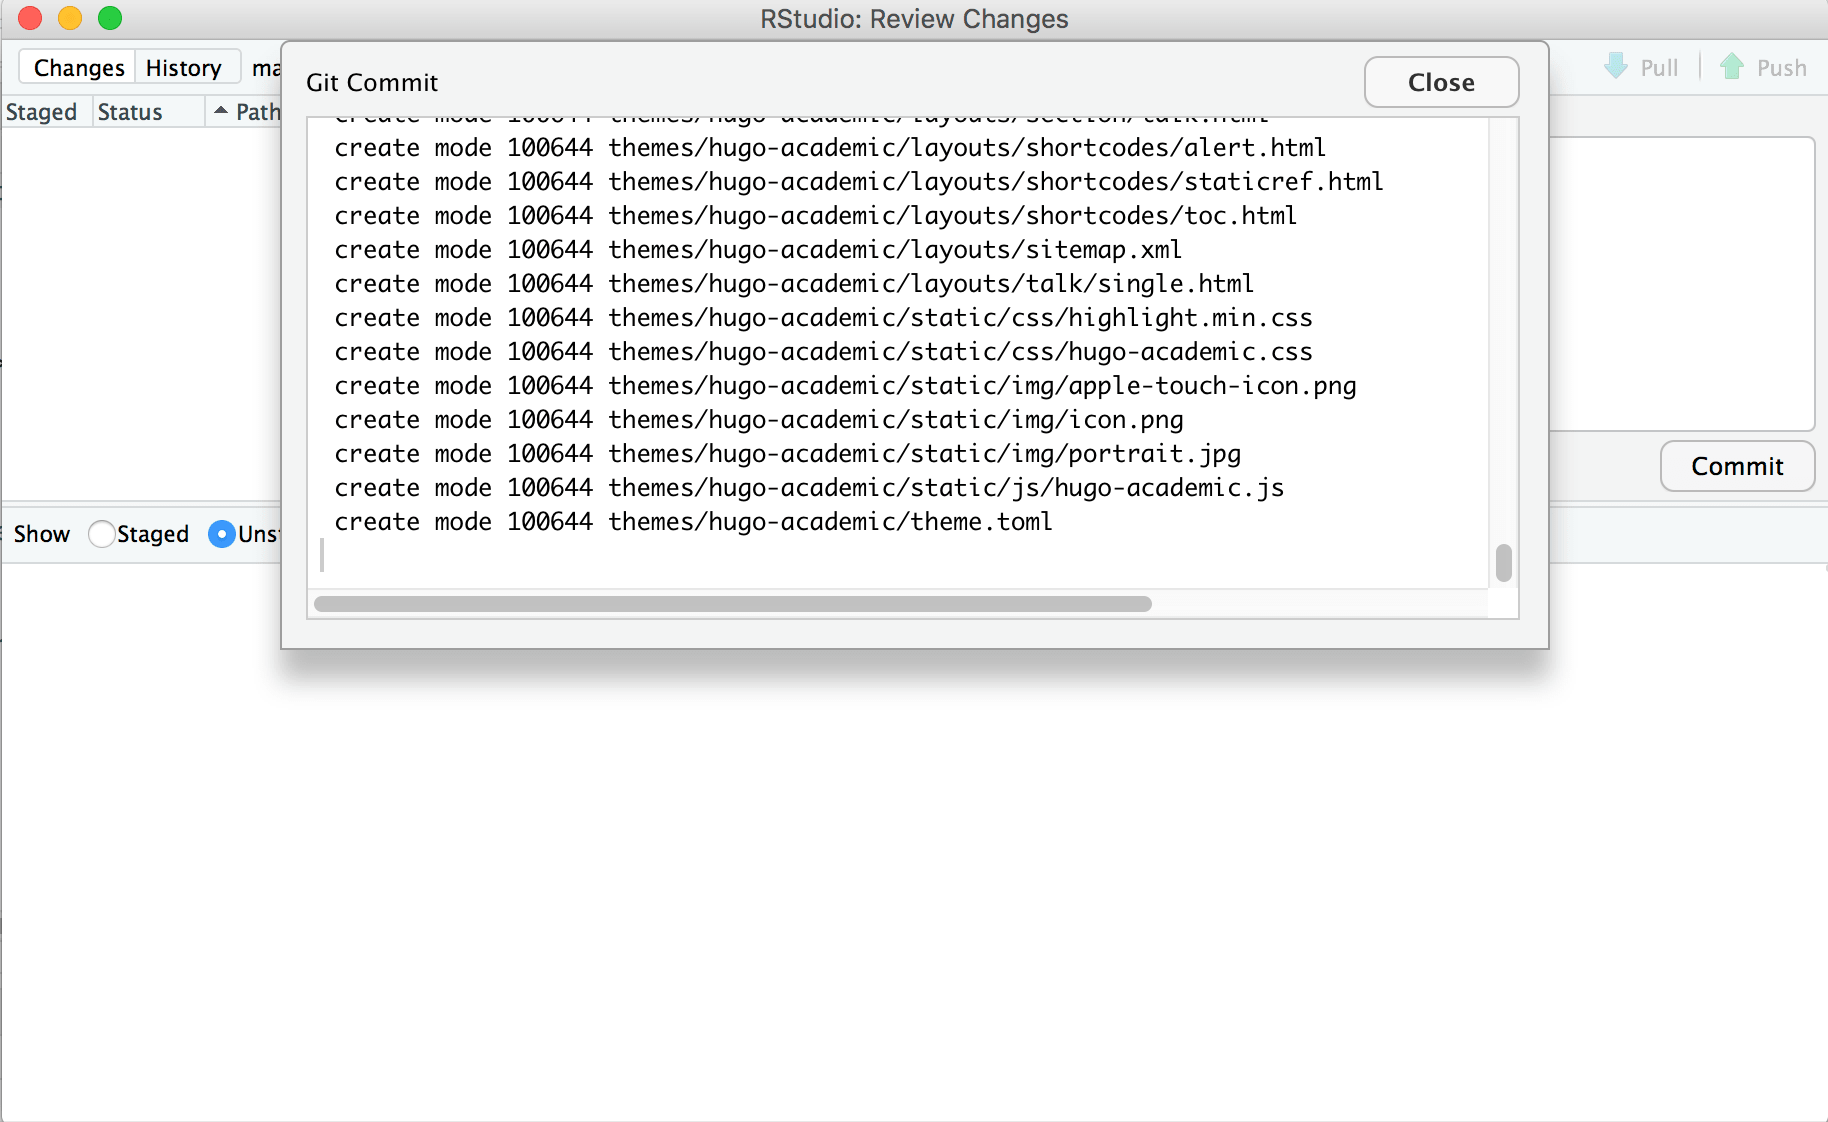
Files are successfully committed.
-
Insert the two copied lines from the GitHub repository into the Terminal tab (red arrow). The first line will establish the connection between the local and the remote repository. The second line will push all the committed local files to the GitHub repository.Depending of you internet connection and how many data has to be transferred this can take a couple of seconds (blue arrow).
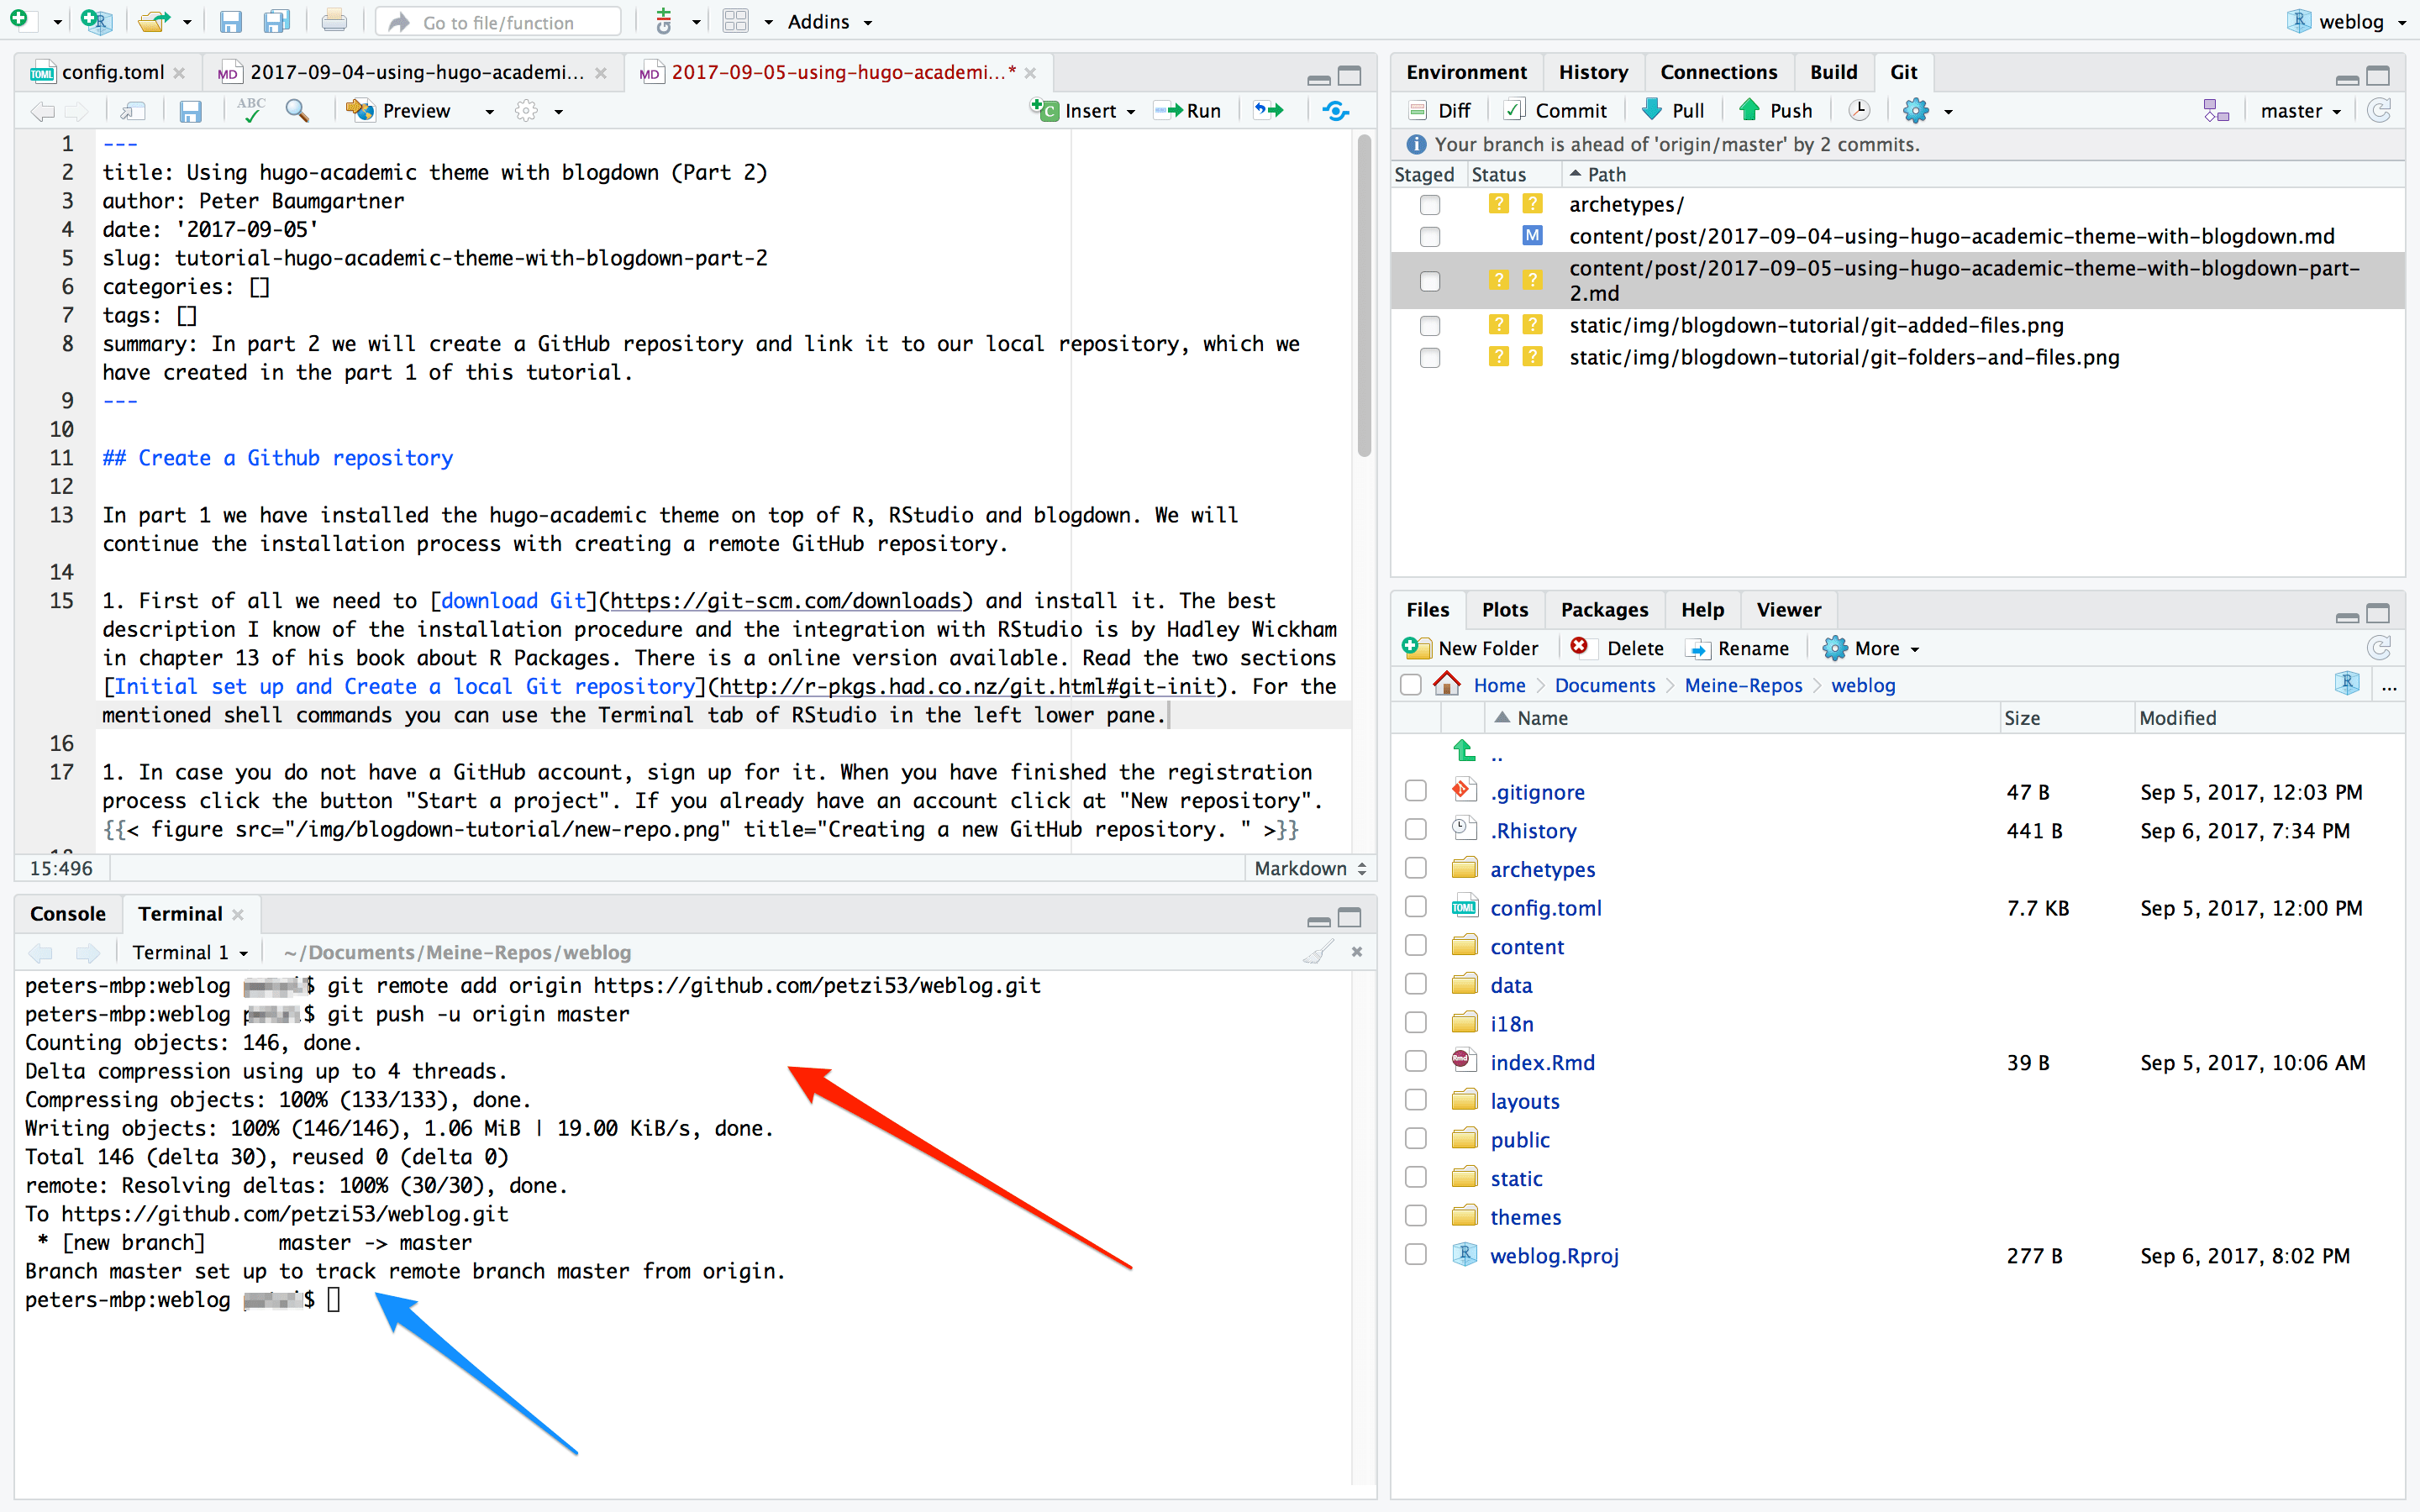
Connecting local Git with remote GitHub repository and pushing the initial commit.

This work by Peter Baumgartner is licensed under a Creative Commons Attribution-ShareAlike 4.0 International License.
Permissions beyond the scope of this license may be available at http://notes.peter-baumgartner.net/contact.
Powered by the docdock theme for Hugo.
Privacy | Disclaimer